
Node.js is a JavaScript runtime that allows you to run JavaScript code on the server side. It is a popular choice for building web applications and real-time systems, such as chat applications and IoT projects.
The Raspberry Pi is a small computer that can be used to run Node.js applications. In this tutorial, we will show you how to use Node.js and the WebSocket library to create a simple chat application that runs on the Raspberry Pi.


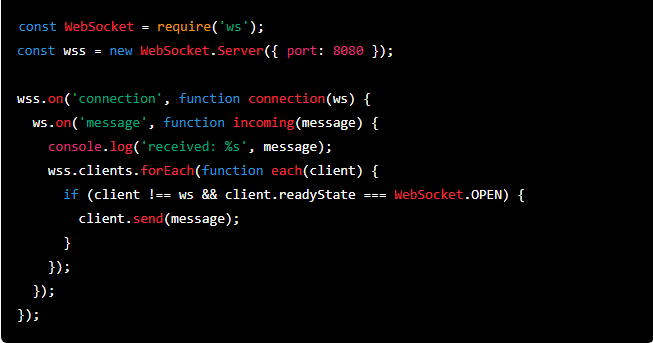

You can start sending messages and they will be sent to all connected clients. You can also access the chat application from other computers on the same network by using the Raspberry Pi's IP address.
Note: This is just a basic example, you can add more features to your chat application like user authentication, message history and more.