
Node.js is a JavaScript runtime that can be used to run server-side scripts on a Raspberry Pi. In this tutorial, we will be using Node.js to control an RGB LED through a websocket connection.
First, you will need to set up your Raspberry Pi with Node.js. You can do this by downloading the latest version of Node.js for the Raspberry Pi from the official website and following the installation instructions.
Next, you will need to connect your RGB LED to the Raspberry Pi. This can be done by connecting the red, green, and blue pins of the LED to the corresponding pins on the Raspberry Pi. You will also need to connect a resistor to the LED to protect the Raspberry Pi from damage.
Once your hardware is set up, you can start writing the code to control the LED. We will be using the npm package "rpi-ws281x-native" to control the LED and the "ws" package to handle the websocket connection.
Here is an example of how you might set up a websocket server that listens for messages to change the color of the LED:
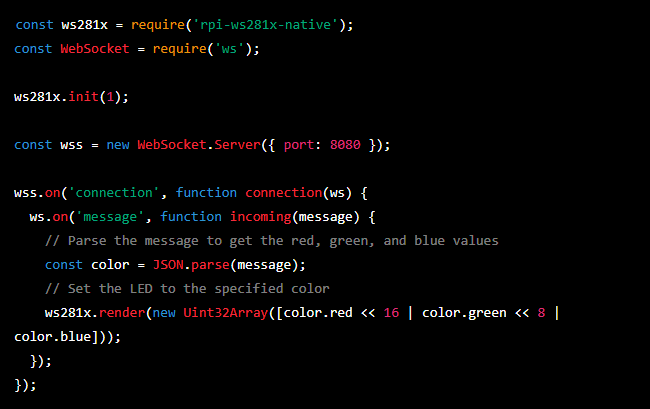
In this example, the server is listening on port 8080 for incoming websocket connections. When a message is received, it parses the message to get the red, green, and blue values and sets the LED to the specified color.
Now you can use a websocket client to send messages to the Raspberry Pi to change the color of the LED. For example, you could use JavaScript to send a message with the following format: {"red": 255, "green": 0, "blue": 0} to turn the LED red.
With this setup, you can now control the color of the RGB LED remotely through a websocket connection. This can be used to create a wide range of projects, such as a smart home lighting system or a status indicator for a web application.